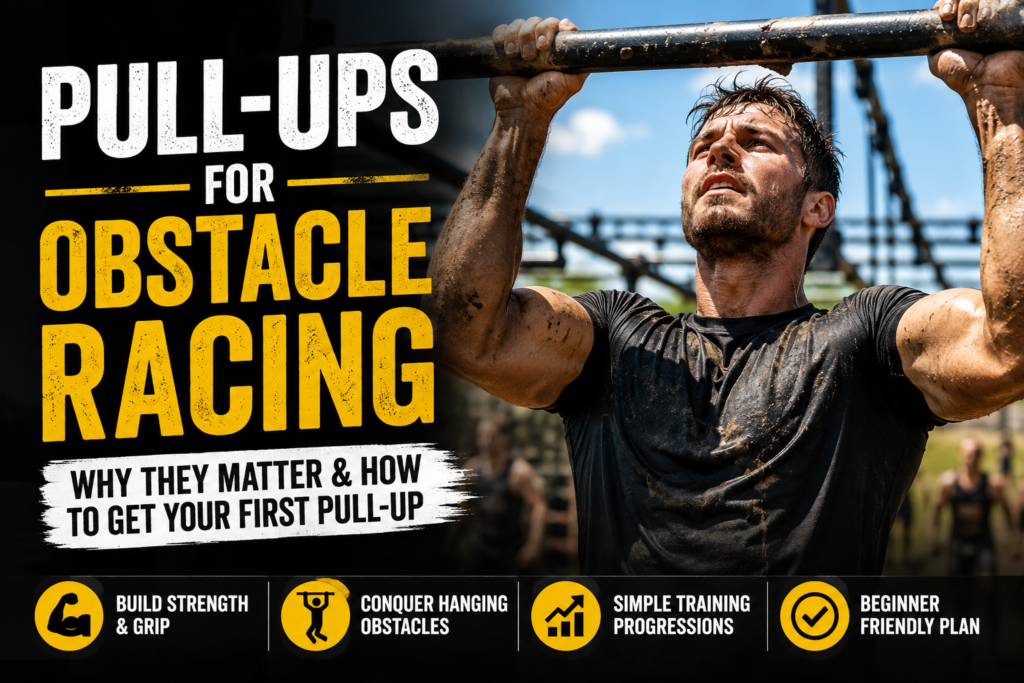
Pull-ups for obstacle racing are one of the most valuable skills you can develop if you want to conquer monkey bars, rope climbs, rigs and other hanging obstacles with confidence.
Introduction
If you’re training for your first obstacle race, there’s a good chance you’re focusing on running.
That makes sense. After all, races like Spartan, Tough Mudder, Hyrox, Nuclear Races, and countless local obstacle events all involve covering several miles over challenging terrain.
But here’s something many first-time competitors discover the hard way:
You don’t usually fail an obstacle race because your legs give up. You fail because your grip does.
You can comfortably run 10 kilometres, only to find yourself hanging from a set of monkey bars with forearms that feel like they’re on fire. A rope climb that looked straightforward suddenly seems impossible. The multi-rig becomes an exercise in survival, and a wall that should have taken seconds turns into minutes of frustration.
The problem usually isn’t your fitness.
It’s that obstacle racing demands a type of strength that many traditional training programmes barely touch.
That’s where pull-ups come in.
Few exercises develop the combination of upper-body strength, grip endurance, shoulder stability, and body control as effectively as the pull-up. Whether your goal is to complete your first 5K obstacle race or tackle a brutal ultra-distance event, improving your pulling strength will make almost every hanging obstacle feel easier.
The good news is that you don’t need to be able to crank out twenty perfect pull-ups to benefit. In fact, if you can’t do a single pull-up today, you’re exactly where many successful obstacle racers started.
In this guide, you’ll learn why Pull-ups for obstacle racing are one of the most valuable skills you can develop, how they transfer directly to the obstacles you’ll face, and the simple training progressions that can take you from zero pull-ups to confidently conquering the course.
Why Pull-Ups for Obstacle Racing Are an OCR Superpower
Most obstacles don’t require you to lift enormous amounts of weight. They require you to move your own body efficiently.
That’s an important distinction.
Whether you’re swinging across monkey bars, climbing a rope, scrambling over a wall, or navigating a multi-rig, your body becomes the resistance. The stronger you are relative to your own bodyweight, the easier those obstacles become.
That’s exactly what pull-ups train.
Unlike many gym exercises that isolate a single muscle, pull-ups teach multiple muscle groups to work together. Your back, shoulders, arms, forearms, grip, and core all have to contribute to every repetition. More importantly, they learn to work as a coordinated system—just as they must during an obstacle race.
This is known as relative strength: how strong you are compared to your bodyweight. In obstacle racing, relative strength is often more valuable than absolute strength. A person who can perform ten controlled pull-ups will usually move more confidently across hanging obstacles than someone who can bench press impressive weights but struggles to support their own body.
Think about some of the obstacles you’ll encounter during a typical OCR event:
- Monkey bars
- Rings and multi-rigs
- Rope climbs
- Traverse walls
- Cargo nets
- High walls
- Horizontal ladders
At first glance, they all look different.
In reality, they’re testing many of the same qualities:
- Can you support your bodyweight?
- Can you keep hold when your forearms are tiring?
- Can you pull yourself into a stronger position?
- Can you stay controlled instead of wasting energy?
Pull-up training develops every one of these abilities.
But there’s another benefit that’s often overlooked.
Confidence.
Anyone who’s stood beneath a difficult obstacle knows that doubt can be just as limiting as a lack of strength. If you’ve never been able to pull yourself over a bar or hang comfortably for more than a few seconds, every hanging obstacle feels intimidating before you’ve even touched it.
As your pull-up strength improves, something changes. You stop wondering whether you’re strong enough and start focusing on how to tackle the obstacle. That shift in confidence can be just as valuable as the physical strength you’ve gained.
The important thing to remember is that you don’t need to become an elite gymnast or crank out twenty pull-ups before entering an obstacle race. Even building enough strength to perform your first controlled pull-up can make a noticeable difference to how you approach—and overcome—the challenges waiting on the course.
Why Most People Can’t Do Their First Pull-Up
If you can’t do a pull-up yet, you’re far from alone.
In fact, one of the biggest misconceptions in fitness is that everyone should naturally be able to pull themselves over a bar.
The truth is that pull-ups are one of the most demanding bodyweight exercises you can perform. They require multiple muscles to work together while lifting your entire bodyweight through a full range of motion. That’s a skill most people simply haven’t developed.
The good news?
It’s a skill—not a talent.
Like any skill, it can be learned with the right approach.
You Don’t Have a Weak Muscle—You Have a Weak Movement
Many people assume there’s one muscle holding them back.
“I just need stronger arms.”
“My back isn’t strong enough.”
“My grip is terrible.”
In reality, your first pull-up depends on several qualities working together.
Your back provides the pulling power.
Your shoulders stabilise the movement.
Your arms help finish each repetition.
Your core keeps your body under control instead of swinging wildly.
Your grip connects everything to the bar.
If just one of those links is weak, the whole movement becomes much harder.
That’s why spending months doing bicep curls rarely results in your first pull-up. The body needs to learn the movement as a whole.
Bodyweight Matters Too
There’s another factor people often overlook.
Every extra kilogram you carry is another kilogram you have to lift.
That doesn’t mean you need to become exceptionally lean before attempting pull-ups. It simply means relative strength matters. Improving your pulling strength, reducing unnecessary body fat, or ideally both, will make every repetition easier.
Think of it this way.
If two people have exactly the same upper-body strength, but one weighs 15 kilograms less, that person will usually find pull-ups easier because they’re lifting less weight with every repetition.
Most People Never Actually Train Pulling
Modern life doesn’t ask much of our pulling muscles.
We spend hours sitting at desks, driving, looking at screens, and pushing doors open. Very few daily activities require us to pull our own bodyweight.
Even many gym routines focus heavily on pushing exercises like bench presses, shoulder presses, and push-ups, while neglecting pulling movements altogether.
It’s hardly surprising that so many people struggle with their first pull-up when they rarely train the movement they’re trying to perform.
The Biggest Mistake of All
Perhaps the most common mistake is trying the same failed strategy over and over again.
People jump up to the bar.
Pull as hard as they can.
Don’t move.
Drop back down.
Repeat.
Weeks later, nothing has changed.
Imagine trying to learn the piano by attempting a difficult concert piece every day without first learning scales or simple songs. You wouldn’t expect to improve very quickly.
Pull-ups work the same way.
The people who succeed aren’t necessarily the strongest.
They’re usually the ones who follow a progression.
They strengthen the individual pieces of the movement, practise consistently, and gradually build towards that first full repetition.
That’s exactly what we’ll look at next.
How to Build Up To Your First Pull-Up
By now, you know that a pull-up isn’t just an arm exercise. It’s a full-body movement that depends on strength, coordination, grip, shoulder stability, and body control.
The mistake many beginners make is trying to jump straight to the finished exercise.
A better approach is to build the movement one piece at a time.
This progression makes pull-ups for obstacle racing achievable even if you can’t do a single repetition today.
Think of it like building a house. You don’t start with the roof. You lay the foundations first, then add each layer until everything comes together.
The same principle applies to your first pull-up.
1. Start by Learning to Hang
It might sound too simple to be useful, but spending time hanging from a pull-up bar is one of the best ways to prepare your body for what’s to come.
Dead hangs strengthen your grip, condition your hands, improve shoulder stability, and help you become comfortable supporting your own bodyweight.
Rather than completely relaxing into the hang, think about creating a strong, controlled position. Keep a very slight bend in your elbows instead of locking them out completely. This takes unnecessary stress off the elbow joints and tendons while allowing your muscles—not your ligaments—to support your weight.
Your shoulders should remain active rather than collapsing up towards your ears, and your body should feel controlled from head to toe.
For many beginners, simply hanging for 20 to 30 seconds is challenging enough.
That’s perfectly normal.
Aim to build towards three sets of 30-second controlled hangs before worrying about full pull-ups.
2. Add Hanging Knee Raises
Once you’re comfortable hanging from the bar, it’s time to introduce movement while maintaining control.
Hanging knee raises are an excellent progression because they teach your core to stabilise your body while you’re suspended from the bar.
From your active hanging position, slowly raise your knees towards your chest before lowering them under control.
Don’t swing.
Don’t use momentum.
Focus on staying tight throughout the movement.
This exercise develops core strength, grip endurance and body control—all qualities that transfer directly to obstacle racing. Whether you’re crossing monkey bars, climbing a rope or negotiating a multi-rig, being able to control your body while hanging makes every obstacle feel more manageable.
3. Teach Your Shoulders How to Start the Pull
Every pull-up begins long before your elbows bend.
It starts with your shoulders.
Begin from the same active hanging position, keeping a very slight bend in your elbows throughout the exercise.
Without bending your arms any further, pull your shoulder blades down and back so your body rises just a few centimetres.
The movement is small, but incredibly important.
As your shoulders engage, you’ll probably notice your body becoming tighter from head to toe. Your core switches on, your body feels more stable, and you may even notice your hips moving slightly forward as tension develops through your entire body.
Don’t force this movement.
It should happen naturally as you create a strong, controlled hanging position.
This shoulder engagement is the first phase of every pull-up. Learning it now teaches your body how an efficient pull-up begins and lays the foundation for every repetition that follows.
4. Build Strength with Body Rows
If you can’t pull yourself vertically yet, pull yourself horizontally.
Body rows (sometimes called Australian pull-ups or inverted rows) are one of the safest and most effective ways to strengthen the same muscles used during pull-ups.
Because your feet stay on the ground, you can adjust the difficulty simply by changing the angle of your body.
As your strength improves, lower your body closer to horizontal to make the exercise harder.
Aim for slow, controlled repetitions, pausing briefly at the top before lowering yourself under control.
Quality always beats quantity.
5. Master Negative Pull-Ups
If there were one exercise I could recommend above all others for achieving your first pull-up, it would probably be negative repetitions.
Instead of trying to pull yourself up, begin at the top position.
Use a step, a bench, or jump into position so your chin starts above the bar.
Pause for a moment, then lower yourself as slowly as possible.
That controlled lowering phase builds strength through exactly the muscles you’ll need to perform a full pull-up.
Don’t worry if your first few attempts only last two or three seconds.
Over time, aim to increase that to five, then eight, then ten seconds.
Every extra second under control is progress.
6. Use Assistance When You Need It
Resistance bands or assisted pull-up machines can be useful tools because they allow you to practise the complete movement without having to lift your full bodyweight.
The key is to use only enough assistance to maintain good technique.
If the band is doing most of the work, you’re not teaching your body what it really needs to learn.
Gradually reduce the assistance as your strength improves until one day you no longer need it.
Remember: Progress Isn’t Always Obvious
One of the frustrating things about pull-up training is that progress often feels invisible.
You might spend weeks improving your grip, strengthening your core, controlling your body while hanging, and lowering yourself more slowly during negative pull-ups without seeing a single full repetition.
Then, one day, it happens.
Your chin clears the bar.
It can feel like it happened overnight.
It didn’t.
That first pull-up was built by every controlled hang, every hanging knee raise, every scapular pull-up, every body row and every negative repetition that came before it.
The visible result is simply the final piece of a much longer process.
A Simple 3-Day Pull-Up Training Plan for Beginners
One of the biggest mistakes beginners make is believing they need to train pull-ups every day.
It’s an understandable assumption. If you want to improve at something, surely practising it as often as possible is the quickest route to success.
In reality, strength isn’t built during your workout. It’s built while your body recovers from it.
Every training session creates a small amount of stress. Given enough food, sleep and recovery time, your body adapts by becoming a little stronger. Train too often without allowing that recovery to happen, and progress can quickly stall.
For most beginners, three focused sessions each week provide the perfect balance between practice and recovery.
The program below follows the same progression we’ve just discussed. Each session develops a different part of the pull-up until the complete movement comes together naturally.
Day 1 – Build Your Foundation
Every pull-up starts with a strong, controlled hanging position.
Active Dead Hangs
3 sets of 20–30 seconds
Grip the bar and create a strong hanging position. Keep a very slight bend in your elbows rather than locking them completely, engage your shoulders and lightly brace your core. Focus on feeling stable and in control throughout each hang.
Hanging Knee Raises
3 sets of 8–12 repetitions
Raise your knees slowly towards your chest before lowering them under control. Avoid swinging or using momentum. The goal is to teach your body to stay tight while hanging from the bar.
Body Rows
3 sets of 8–12 repetitions
Pull your chest towards the bar with slow, controlled repetitions. Pause briefly at the top before lowering yourself under control.
Today’s session teaches your body how to support, stabilize and control its own weight—the foundation of every successful pull-up.
Day 2 – Learn the Pulling Sequence
Now that you’re comfortable hanging from the bar, it’s time to teach your body how a pull-up actually begins.
Scapular Pull-Ups
3 sets of 8–10 repetitions
Begin in an active hang with a slight bend in your elbows. Without bending your arms much further, pull your shoulder blades down and back so your body rises just a few centimetres.
Remember, this isn’t a miniature pull-up. It’s the first movement every full pull-up starts with. Learning this sequence teaches your shoulders to initiate the pull before your arms take over.
Negative Pull-Ups
3 sets of 3–5 repetitions
Use a step or bench to begin with your chin above the bar, then lower yourself as slowly as possible.
Aim to increase the length of each descent over time. Every extra second under control is helping build the strength needed for your first full repetition.
Farmer Carries
3 walks of 30–60 seconds
Carry a pair of heavy dumbbells, kettlebells or any suitably heavy objects while maintaining good posture.
This simple exercise develops grip endurance that transfers directly to monkey bars, rope climbs and other hanging obstacles.
Today’s session is all about teaching your body how to pull efficiently while strengthening the weakest part of the movement.
Day 3 – Put Everything Together
By now you’ve built the individual pieces.
Today’s session combines them into the complete movement.
Band-Assisted Pull-Ups
3 sets of 5–8 repetitions
Use only enough assistance to perform smooth, controlled repetitions with good technique.
Concentrate on the sequence you’ve been practising all week:
- Establish a strong active hang.
- Engage your shoulders first.
- Pull your elbows down towards your sides.
- Stay tight through your core.
- Lower yourself under control.
Every repetition is an opportunity to reinforce good movement patterns.
Negative Pull-Ups
2–3 sets of 3 repetitions
Finish with a few high-quality negatives to reinforce strength through the lowering phase.
Active Dead Hangs
2 sets of 20–30 seconds
End the session with controlled hangs to continue building grip endurance and confidence on the bar.
How Long Until You Get Your First Pull-Up?
This is probably the question every beginner wants answered.
The honest answer is that nobody can tell you exactly.
Your bodyweight, current strength, recovery, consistency and previous training experience all influence how quickly you’ll progress.
Some people achieve their first pull-up within a few weeks.
Others may take several months.
Neither is a failure.
Instead of measuring success by a single repetition, look for the small improvements that happen along the way.
Ask yourself:
- Can I hang for longer than I could a few weeks ago?
- Is my body more stable during hanging knee raises?
- Can I control my scapular pull-ups more smoothly?
- Are my negative pull-ups lasting longer?
- Am I using a lighter resistance band than when I started?
- Does hanging from the bar feel more comfortable and confident?
If you’re answering “yes” to those questions, you’re making progress.
Your first pull-up isn’t a lucky breakthrough.
It’s the natural result of dozens of small improvements that have been quietly accumulating every time you train.
Stay consistent, trust the process, and one day you’ll realise you’ve done something that once seemed impossible.
Common Mistakes That Stop People Getting Their First Pull-Up
One of the reasons pull-ups have such a fearsome reputation is that many people spend months training without making any real progress.
More often than not, the problem isn’t a lack of effort.
It’s that they’re practising the wrong things.
Avoiding the following mistakes will help you progress more quickly while reducing your risk of injury.
Trying Full Pull-Ups Before You’re Ready
There’s nothing wrong with testing yourself occasionally, but attempting full pull-ups over and over again when you don’t yet have the strength rarely leads to progress.
If every repetition ends the same way—with your feet leaving the floor and your body barely moving—you aren’t giving your muscles enough quality work to improve.
Build the individual pieces first. Strong hangs, controlled shoulder engagement, body rows, negative pull-ups and assisted repetitions all contribute towards your first full pull-up.
When the time is right, the movement will come together naturally.
Locking Your Elbows During Every Hang
Many beginners interpret a dead hang as completely relaxing while hanging from locked elbows.
Although this position has its place in certain types of training, it places unnecessary stress on the elbow joints, tendons and passive structures, especially if you’re new to hanging exercises.
Instead, keep a very slight bend in your elbows, maintain active shoulders and create gentle tension throughout your body.
This develops strength where you need it most while making your training more comfortable and sustainable.
Ignoring Your Grip
Your back may be strong enough to perform a pull-up, but if your hands give up first, you’ll never get the opportunity to use that strength.
Grip endurance is often the limiting factor for beginners and obstacle course racers alike.
Regular active hangs, farmer carries and time spent on the bar gradually build the grip strength needed to stay in control when fatigue starts to set in.
Using Momentum Instead of Strength
Kicking your legs, swinging your body or jerking yourself towards the bar might help you complete a repetition, but it doesn’t teach the movement pattern you’re trying to develop.
In fact, excessive momentum often hides weaknesses rather than fixing them.
Focus on smooth, controlled repetitions.
Quality movement will always produce better long-term results than chasing higher numbers.
Neglecting Recovery
More isn’t always better.
Your muscles, tendons and connective tissues need time to adapt to training, especially if hanging exercises are new to you.
Training hard every day often leads to sore elbows, aching shoulders and stalled progress.
Three well-planned sessions each week, combined with good sleep and proper nutrition, will usually produce better results than training seven days a week.
Comparing Yourself to Everyone Else
Social media has made it easy to compare your first few weeks of training with someone else’s ten years of experience.
That comparison is rarely helpful.
Some people achieve their first pull-up quickly.
Others take longer because of bodyweight, previous injuries, age or training history.
None of that changes the process.
The only comparison that matters is whether you’re stronger than you were last month.
If your hangs are longer, your body feels more stable and your negatives are slower, you’re moving in the right direction.
Be Patient
Your first pull-up isn’t won by one heroic training session.
It’s earned through hundreds of small, consistent efforts that gradually make your body stronger, more stable and more confident on the bar.
Stay patient.
Trust the process.
The bar doesn’t care how long it takes.
It only responds to consistent effort.
Final Thoughts
Every obstacle course racer remembers the first obstacle that exposed a weakness.
For some, it’s a steep hill that leaves their legs burning.
For others, it’s carrying a heavy sandbag or bucket.
For many, it’s the first obstacle that requires them to support their own bodyweight.
Monkey bars.
Rope climbs.
Walls.
Rigs.
Traverse obstacles.
These are often where races become less about fitness and more about confidence.
The good news is that pull-up strength isn’t reserved for elite athletes or lightweight gymnasts.
It’s a skill that almost anyone can develop with the right approach.
You don’t need to spend hours in the gym.
You don’t need expensive equipment.
And you certainly don’t need to be able to perform ten perfect pull-ups before entering your first obstacle race.
You simply need to start where you are, build the movement step by step and stay consistent.
By following a structured approach to pull-ups for obstacle racing, you’ll build the strength and confidence needed for hanging obstacles on race day.
Every controlled hang strengthens your grip.
Every hanging knee raise improves your body control.
Every scapular pull-up teaches your shoulders how to engage.
Every body row builds pulling strength.
Every negative repetition brings you one step closer to pulling yourself over the bar under your own power.
Those small improvements don’t just make you better at pull-ups.
They make you a stronger, more capable obstacle course racer.
One day, almost without warning, you’ll pull yourself over the bar for the first time.
Then you’ll realise something even more important.
You didn’t just build a pull-up.
You built the strength and confidence to tackle obstacles that once looked impossible.
Frequently Asked Questions
How many pull-ups do I need for obstacle racing?
You don’t need to be able to perform twenty consecutive pull-ups to enjoy obstacle racing or complete most events successfully. Even achieving your first controlled pull-up is a significant milestone because it demonstrates that you’ve developed the grip strength, pulling power and body control needed for many common obstacles.
The stronger you become, the easier monkey bars, rope climbs, rigs and walls will feel, but don’t wait until you’re “good enough” before entering your first race.
Can I train pull-ups every day?
For most beginners, no.
Pull-up training places considerable stress on your muscles, tendons and joints. Those tissues become stronger during recovery, not while you’re training.
Three well-planned sessions each week are usually enough to make consistent progress while allowing your body time to recover and adapt.
If your elbows or shoulders remain sore between sessions, it’s often a sign that you need more recovery rather than more training.
Are pull-ups harder if you’re overweight?
Yes—but that doesn’t mean you shouldn’t train them.
Every pull-up requires you to lift your own bodyweight, so carrying extra weight naturally makes the exercise more challenging.
The solution isn’t simply to lose weight or simply to get stronger.
Ideally, improve both at the same time.
As your pulling strength increases and unnecessary bodyweight decreases, pull-ups become progressively easier.
Should beginners use resistance bands?
Yes—as long as you use them correctly.
Resistance bands allow you to practise the complete pull-up movement before you’re strong enough to lift your full bodyweight.
The goal isn’t to rely on the band forever.
Choose the lightest band that allows you to perform controlled repetitions with good technique, then gradually reduce the assistance as your strength improves.
Think of the band as a temporary training tool, not a permanent solution.
What’s the fastest way to get your first pull-up?
There isn’t a shortcut.
The quickest progress usually comes from following a structured progression rather than repeatedly attempting full pull-ups.
Focus on building the foundations first:
- Active hangs
- Hanging knee raises
- Scapular pull-ups
- Body rows
- Negative pull-ups
- Band-assisted pull-ups
Master each stage, stay consistent and allow your body time to recover between sessions.
For most people, patience and consistency outperform shortcuts every time.
What if I can’t even hang from the bar?
That’s exactly where many people begin.
If hanging from a pull-up bar feels impossible, start with very short active hangs of just five or ten seconds. Rest, then repeat several times.
As your grip, shoulders and confidence improve, gradually increase the time you spend hanging.
Every second on the bar is helping your body adapt, even if it doesn’t feel like much at first.
Ready to Get Your First Pull-Up?
If you’d rather follow a complete programme than piece everything together yourself, my Get Your First Pull-Up Guide takes you through every stage in far more detail, including:
- A step-by-step progression that builds strength safely.
- Structured training plans for beginners.
- Common mistakes and how to avoid them.
- Practical coaching tips developed through years of bodyweight training.
- A programme you can follow whether your goal is obstacle racing, general fitness or simply achieving your first pull-up.
Whether you’re training for your first OCR, preparing for a tougher race next season or simply want to master one of the most rewarding bodyweight exercises, the guide provides a clear path from where you are today to your first successful repetition.
Because every obstacle course racer starts in exactly the same place.
Looking up at your first obstacle…
…and wondering if today might be the day they finally pull themselves over it.
Check out my article on: how-to-train-for-an-obstacle-course-race for more OCR preparation tips.
About the Author
Steve Robson is a former Royal Marines Commando and bodyweight training coach with decades of practical experience developing strength through progressive bodyweight training. His focus is simple: helping ordinary people build the strength, confidence and resilience to tackle bigger physical challenges—whether that’s achieving a first pull-up, preparing for an obstacle course race or simply becoming stronger for everyday life.
If you’re serious about preparing for an obstacle race, you may also enjoy my Commando Fitness: 26 Weeks to Elite Military Conditioning—a progressive training program designed to build the strength, endurance and mental resilience needed to tackle demanding physical challenges.